Can You Rebuild a Zero Turn Motor? Here’s What You Need to Know!
A well-maintained Zero Turn motor is key to speed and maneuverability. However, if it becomes faulty, it can hinder your ability to mow tight spaces and achieve a close cut.
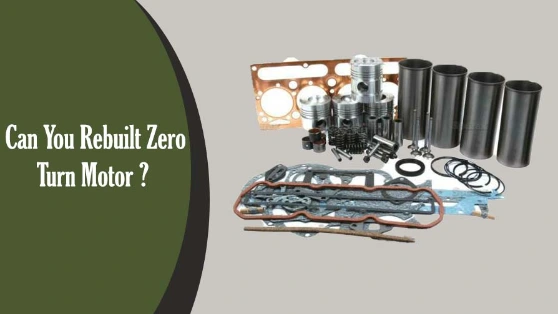
In such cases, rebuilding the motor can be a cost-effective solution. But you might wonder, can you rebuild the motor on your zero-turn mower?
Yes, you can rebuild the motor by following these step-by-step instructions.
- Inspect the parts.
- Resurface the Piston’s bottom.
- Work with Center Section and Pump
- Resurface the Center Section
- Resurface the back of the Center Section.
- Fitting and finish
With proper instruments and necessary instructions, rebuilding a Zero turn motor is an easy and effortless job. It may cost you 20 to 25 dollars. Stay here to learn the whole DIY process.
What Are the Signs When My Zero-turn Motor is Bad?
Here are some major early signs you may notice when your zero-turn motor is bad.
- Cranking noise, but the engine is not turning
- Clicking sound when the button is pressed
- You noticed problems when you attempted to start but could not.
Is it Worth Rebuilding the Zero Turn Motor?
Zero-turn motors are used in small engines like a mower or small tractors. When it comes to replacement, rebuilding is better than replacement.
After spending a few bucks, you can easily extend your motor life for one or two years. A new motor may cost you more than 200 dollars.
Another thing that makes it worth rebuilding the zero-turn motor is that it not only suits the damaged motors, but you can also rebuild it to enhance the performance.
If your zero-turn motor is not performing up to the desired level, you can go for rebuilding to extend its performance level.
Related Post: Zero Turn Mower in Sandy Soil (Face Difficulties?!)
How Much Does it Cost to Rebuild Zero Turn Motor?
It varies depending on the brand and motor capacity. An average rebuilding takes 20 to 25 dollars. But if you have more problems, it may cost you up to 80$.
Rebuilding Zero Turn Motor: Step-by-step guide
I mentioned earlier that rebuilding the zero-turn motor could be challenging if you do not have the necessary instructions.
But if you follow proper instructions and carefully implement them, it will simplify your job. Here, I will share step-by-step instructions to rebuild the zero-turn motor.
Things you will need:
- 400,600 and 2000 grit sandpaper
- Synthetic Oil
- Cast iron table
- Cleaner
- Honing block
- Safety Gloves
- Aviation Gas kit
Steps To Follow: How to Rebuild a Zero Turn Motor?
Let’s solve the issue by following the easy 6 steps.
Step 1: Inspect the Parts.
First, inspect each part of the motor to know what you need to do to resolve the problem. Check the ring pistons.
Check the pistons; they are good if they move up and down and wobble properly. Then inspect the bottom of the pistons; you would see some wear on the bottom that needs to resurface.
Step 2- Resurface the Piston’s Bottom.
Resurfacing the bottom of the pistons is quite simple; you can do this with different sandpapers. First, take 400 grit sandpaper, wet it with oil, and rub the bottom on the grit paper for a couple of minutes.
Check its surface; if you need more smoothness, you can use 600 or 1000 grit sandpaper. Keep rubbing the bottom on the grit paper until you get the desired smoothness level. It should be friendly, shining, and clean.

For better cleaning, you can use the cleaning sprayer to get a shining surface.
Step 3- Work with Center Section and Pump
Now come to the center section from the transmission, one side the motor the other side is where the pump goes.
Because of wear and tear, groves appear that cause fluid leakage and pressure loss. You can check and feel the groves with your finger touches.
If grooves exist, you need to resurface the center section from both sides to get a smooth surface. You can fix this issue with a couple of sandpapers.

Step 4- Resurface the Center Section
What I’m going to do here is use the honing block to hone a chisel to get them nice and sharp. You can start with any sandpaper; here, we will use 400 grit sandpaper.
Take the honing block, wet it with oil, and use it over the pump side. Rub it with a honing block and by wrapping it in 400 grit sandpaper. You may not rub it in a circle, so rub it forth and back to get a clean surface. While rubbing, keep good pressure for quick smoothness.
Once you have done with 400 grit sandpaper, you can use 1000 grit or 2000 grit for a more delicate surface. But wet it with oil every time, wrap the honing block, and rub the surface. Just be patient; getting a perfect and shining surface may take 5 to 10 minutes.
There are no restrictions on using the grit sandpaper; you can use any of the available and best ones like 400, 600, 1000, or 2000 grit sandpapers. But for perfect groove removal, higher numbers are better.

Step 5- Resurface the back of the Center Section.
Remove the magnet section from the centre section and clean the surface. You can use different grit sandpapers to smoothen the surface if there are grooves.
Here grooves will be much less than in the pump section. So, using 400 or 600 grit sandpaper is fine for this section.
Follow the similar instructions as you followed previously. Use oil and honing blocks to resurface and remove the grooves.

Step 6- Fitting and finish
Okay, it is the final step of rebuilding the zero-turn motor, arranging all parts, and fitting them to reassemble them. Before fitting, use the aviation gasket over the different parts of the motor and leave it for a couple of minutes.
It is a little stick and protects from leakage or breakage of the parts. Apply the aviation gas with a brush on both sides of the gas kit. Then put the other side cover over the motor and screw the screws.
Your zero-turn lawn mower motor has been rebuilt, and now it is ready to ride. But before restarting the mowing, turn on the mower four to five times to check. Please leave it in the switched-on position for a few minutes, and then start your mowing.
Read Also: Zero Turn Mower Won’t Go Forward or Reverse! How to Fix It?
Final Verdict
Zero-turn motors are excellent motor choices for small engines. They perform well, but improper use may cause quick wear and tear.
Before replacing the motor, you should try rebuilding the zero-turn motor; it will save your money and enhance motor performance. It will also reduce the repair and maintenance and increase its lifespan.
Related Posts:
- Step-by-step guide: Engaging blades on a Gravely zero turn mower
- Easy 5-step guide: Fixing Exmark zero turn steering problems
- How to properly drain fuel from a Kubota zero-turn mower
- Step-by-step guide: Using zero turn mower ramps for changing blades
- How to troubleshoot Lesco zero turn mower problems: Easy solutions

