How To Fix Exmark Zero Turn Steering Problems? Easy 5 Steps (Solved!)
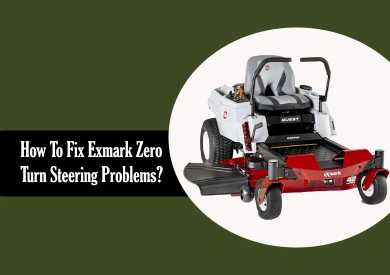
Nowadays, Exmark zero-turn mower becomes one of the best go-to options for landscape professionals due to its excellent cutting quality. But if your Exmark has a steering problem, you will lose control which may cause an accident. In that case, the question comes naturally, how do I fix my Exmark zero turn steering problems? Well, the solution is nothing but a step-by-step process.
- Firstly, arrange the required tools; disconnect the steering wheel arm from the wheel axle.
- Then remove the plate after removing the two bolts.
- Get access to the center groove- remove and clean it with a brush.
- Reinstall everything back and take a ride to test.
Lawn mower steering is essential; it is necessary to keep it in good form. It might become faulty, but it’s an easy solution if you know the basic troubleshooting.
4 Common Causes And Solutions for Exmark zero turn Steering Problems
Following are some of the most common causes and solutions of Exmark zero turn steering problems.
4 common causes And Solutions:
Problem 1: Slipped Steering Gear
When you hit the tree, brick, or curb, you may have dislodged the gear that controls your mower steering. Once it is dislodged, the gear won’t work without fixing.
Solution 1:
Loosen up the bolt that controls and holds the steering gear in place. Then turn the steering wheel to the left until you hear the sound of the gear popping back to its correct position.
Once repaired, tighten the bolt, and your Exmark zero turn mower is ready for the mowing job. If you see the gear is damaged, replacing it with a new one is the best solution.
Problem 2: Tire Pressure
Over or under-inflated tires can also cause problems with your steering system. You can easily fix the tire pressure issue by reading the manual.
Solution 2:
Read the Exmark zero turn mower operator’s manual to know the correct pressure level for your mower’s tires. Once read the manual, take the tire gauge and check the mower’s tires.
If the psi does not match the recommended tire level, fix them. You can inflate or release the air from the mower’s tire to get the right pressure level
Problem 3: Dislodged Ball Joint
The dislodged ball joint can also make your Exmark zero turn steering problematic. It mostly happens when it is hit by some hard object like a tree, wall or rock.
Solution 3:
When the ball joint is dislodged, your mower steering will suffer. So check the ball joints to make sure they are in place.
If they are dislodged, loosen the bolts on the assembly and pop the ball joint to take them back to the right place.
Once they are secured, turn the wheel on the left or right side to check the steering wheel is responding correctly as you turn the wheel.
Problem 4: Damaged Bushes
If you have damaged bushing, your steering system will also suffer. The steering will become stiff and you will face problems while mowing.
Solution 4:
Exmark steering system bushings are under the steering gear. To access the system remove the nuts that control the gear in place and then pull the gear off the machine.
Now remove the bushing that is beneath it. Install new bushing, replace the gears and then secure the nuts back to take the bushing and gear to the correct place.
Ways to fix Exmark zero turn Steering Problems
When you have a problem with your Exmark zero-turn steering wheel, do not worry. By following simple steps, you can fix the issue within 30 minutes.
Things you will need:
- Half inch wrench
- Socket wrench
- Brush
Easy 5 steps to fix the Exmark zero turn steering issues:
Step 1- Access the Bottom Area
The first thing that you need to do is to lower the deck to access the area where you want to keep the steering wheel straight. Try to move the steering wheel; you will see the wheel is not moving to the side and forth or back.
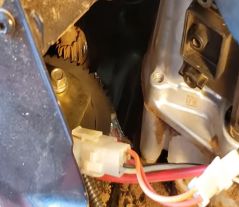
Come down to the bottom area, where the gear teeth are moving. Now get up your steering wheel lined up straight, and mark these teeth on the plate with a sharpie marker. It will help you understand where the gear’s center should be when it gets back together.
Step 2- Disconnect Wheel Arm From Axle
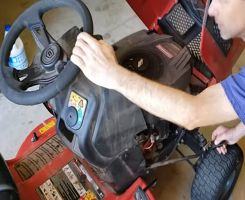
Remove the engine top cover and then disconnect the wheel arm from the wheel axle. The arm moves when you turn the steering wheel, so it must disconnect from the axle. By disconnecting, you can move; otherwise, the steering wheel will remain jam-free.
Take two half inches of wrenches on both sides of the arm bolts and loosen them. Once they are loose, remove the arm from the axle. Now check the steering wheel; it will be easy to turn on either side.
Step 3- Remove Plate Bolts
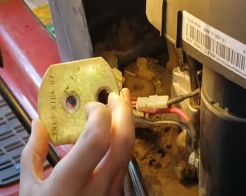
Go to the bottom of the mower engine system; you will see the plate is installed and fixed with two bolts. You will need to remove the plate, but it is only possible when you will remove the bolts.
Unplug the connectors to get access to the bolts. These bolts are a little away from you, so you may be unable to access them with simple hand wrenches. So, take a socket wrench and lose and remove both bolts.
Once the bolts are removed, simply pull up the plate and remove it from its place. Set the plate and bolts aside in a safe place.
Step 4- Clean The Groove
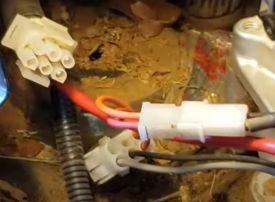
After removing the plate, you will get access to the grove. Look at the groove; you will see the dirt or small grass particles. When it moves, grass or debris stops the groove from turning.
So take the brush and clean all the debris; here, you will see metal tape to stop the debris from coming inside. But when you hit something, the plate may bend, which allows the debris to get in on the groove.
Remove the groove and clean it properly; also, fix the tape; if needed, you can replace it with something new or try to remove the bents, which is feasible.
Step 5- Reinstall The Groove
Once the groove is cleaned, attach it to the wheel arm and then put it back in its place. Attach the other side to the wheel axle. Now take a spacer and fix the groove, then screw the plate with the two bolts.
Take wrenches and attach the arm with the wheel axle by two bolts on the sides. Now check the steering wheel, and it will move freely on all sides. You have fixed the issue.
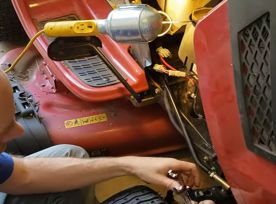
Take a few yards to check the steering wheel movement. Test the steering wheel by moving the mower forth and back.
Final Verdict
Your Exmark mower’s steering wheel can have a problem because of several reasons. Whenever you face a problem, first identify the reason and then fix it as recommended. But always make sure you have the right tools and safety equipment to finish your job safely and quickly.
Related Posts:
- Step-by-step guide: Engaging blades on a Gravely zero turn mower
- Comprehensive guide: Rebuilding a zero turn motor in detail
- Step-by-step guide: Draining gas from Kubota zero-turn lawn mower
- Proper technique for utilizing zero turn mower ramps to change blades
- How to troubleshoot Lesco zero turn mower problems: Easy solutions
