How to Level a Mowing Deck: Step-by-Step Guide for Walk-Behind Mowers
TL;DR
- An uneven mowing deck causes streaky, scalped, or one-sided cuts – leveling it takes 20-30 minutes with basic tools.
- You need a flat surface, a ruler or deck gauge, and a wrench. No special equipment required.
- Check deck level at the start of every season and any time your cut quality changes unexpectedly.
- Most walk-behind mowers adjust via the lift linkage or blade height pins on each wheel bracket.
- If one side of your lawn looks shorter than the other after mowing, the deck is almost certainly out of level.
Why Your Mowing Deck Goes Out of Level
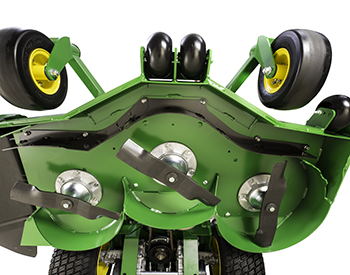
Credit: https://www.deere.com/
A mowing deck goes out of level when one side sits lower than the other, causing the blade to cut at an angle instead of flat across the lawn. The result is a lawn that looks striped, scalped on one side, or just uneven in a way that a height adjustment alone won’t fix.
This happens for a few common reasons. Hitting a root, curb edge, or hidden rock can knock the deck linkage out of alignment. Normal wear on the wheel brackets over a full season can also let one side drift lower. On Toro Recycler and Honda HRX models, it usually shows up after the second or third season of regular use.
What You Need Before You Start
Tools:
- Tape measure or a dedicated deck gauge (Oregon 42-295 or similar, around $10-$15)
- Adjustable wrench or socket set (3/8″ drive handles most walk-behind hardware)
- Permanent marker
Safety steps:
- Disconnect the spark plug wire before reaching under the deck. Pull the boot off the plug and tuck it away from the terminal.
- Park the mower on a flat, hard surface – a concrete driveway or garage floor. Grass compresses unevenly and throws off your measurements.
- Let the engine cool completely before working near the deck.
Step 1: Park on a Flat Surface and Set All Wheels to the Same Height
Set all four wheels to the same height position using the height adjustment levers on each wheel bracket. Middle height works well – typically position 3 of 5 on most walk-behinds.
This gives you a neutral baseline. If the wheels are at different heights when you start measuring, your readings won’t tell you anything useful.
Step 2: Rotate the Blade Parallel to the Mower Body
Rotate the blade by hand (spark plug wire is disconnected) so it runs front-to-back, parallel to the length of the mower. This is your measurement position.
Mark one blade tip with a permanent marker so you can track which end is which throughout the process.
Step 3: Measure Blade Height at the Front and Rear
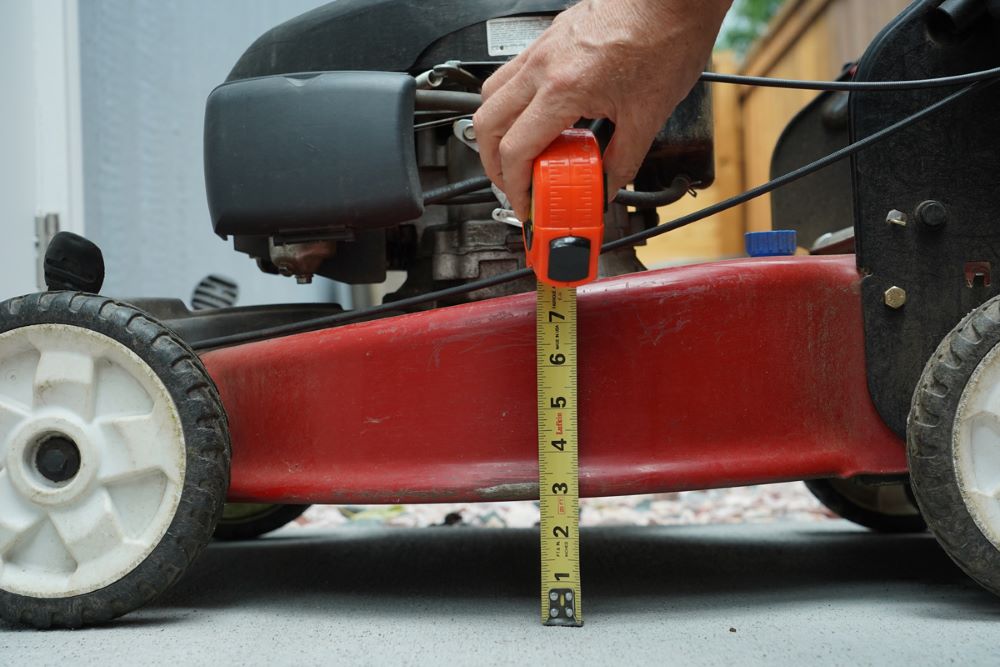
Credit: https://www.denverwater.org/
Measure from the ground to the marked blade tip at the front of the mower, then again at the rear. Write both numbers down.
Most manufacturer specs call for the front of the deck to sit 1/8″ to 1/4″ lower than the rear (Briggs & Stratton engine guidelines, 2023). This slight forward pitch improves airflow under the deck and delivers a cleaner cut. If your front and rear measurements match exactly, the deck pitch is flat – which is actually not ideal.
Step 4: Rotate the Blade Side to Side and Measure Again
Now rotate the blade so it runs perpendicular to the mower – left to right. Measure from the ground to each blade tip on the left side and the right side.
Both measurements should match within 1/8″. If one side is more than 1/8″ lower than the other, that side needs to come up. Write down which side is low and by how much.
Step 5: Adjust the Low Side Using the Wheel Bracket or Lift Linkage
On most walk-behind mowers, deck height on each side is controlled by the wheel height adjustment bracket. Raising the wheel position on the low side effectively raises that side of the deck.
On Toro and Honda push mowers, each rear wheel bracket has a single pivot bolt. Loosen it, move the bracket up one notch, retighten, and re-measure. On Craftsman and Husqvarna walk-behinds, the adjustment is usually a height pin that pulls out, repositions, and locks back in.
Re-measure after each adjustment. Make one change at a time – chasing both front-rear pitch and side-to-side level simultaneously gets confusing fast.
Step 6: Confirm Level and Reconnect the Spark Plug Wire
Once your side-to-side measurements are within 1/8″ and your front is sitting 1/8″-1/4″ lower than the rear, the deck is level. Reconnect the spark plug wire. Make one pass across a test strip of lawn at your normal cutting height and check for an even cut across the full blade width.
If the cut still looks uneven after leveling, the blade itself may be bent or dull – a separate issue that leveling alone won’t fix.
What to Do If Something Goes Wrong
| Problem | Likely Cause | Fix |
|---|---|---|
| Measurements keep changing between checks | Mower moved off flat surface | Reset on concrete, recheck all four wheels at same height |
| One side won’t go higher despite adjustment | Wheel bracket is bent or cracked | Replace the wheel bracket – usually $8-$15 at most hardware stores |
| Cut still uneven after leveling | Blade is bent or out of balance | Remove blade and inspect for bends; replace if warped |
| Front sits higher than rear after adjustment | Wheel position too high in front | Drop front wheels one notch and re-measure |
| Blade won’t rotate freely by hand | Grass packed under deck | Clear the deck before measuring; packed clippings affect blade movement |
Frequently Asked Questions
How often should you level a mowing deck on a walk-behind?
Check deck level once at the start of each mowing season and any time your cut quality changes noticeably. If you mow over rough terrain or hit a hard object like a root or curb edge, check it right away. Most homeowners who mow weekly need to check twice per season.
How do I know if my mowing deck is out of level?
The clearest sign is an uneven cut – one side of the lawn looks shorter than the other in the same pass, or you see a consistent scalped strip along one edge. A streaky cut that worsens on flat ground and improves on slopes is another reliable indicator.
Can I level a mowing deck without a deck gauge?
Yes. A standard tape measure works fine for walk-behind mowers. Measure from the ground to the blade tip at each position and compare the numbers. A dedicated deck gauge like the Oregon 42-295 just makes it faster and easier to hold the tape steady.
What happens if you never level your mowing deck?
An unlevel deck tears grass unevenly, which stresses the lawn and leaves it more vulnerable to disease and drought. It also puts uneven load on the blade, which wears the spindle faster. Over a full season, an unlevel deck noticeably degrades both lawn appearance and mower longevity.
How long does it take to level a walk-behind mowing deck?
Most homeowners finish in 20-30 minutes the first time. Once you know where your adjustment points are on your specific mower, repeat checks take about 10 minutes.
Quick Recap
- Step 1: Set all four wheels to the same height position on flat ground.
- Step 2: Rotate the blade front-to-back and mark one tip.
- Step 3: Measure blade height at the front and rear – front should sit 1/8″ to 1/4″ lower.
- Step 4: Rotate blade side-to-side and compare left and right measurements – match within 1/8″.
- Step 5: Adjust the low side via the wheel bracket or lift linkage, one notch at a time.
- Step 6: Confirm measurements, reconnect the spark plug wire, and test with a real pass.