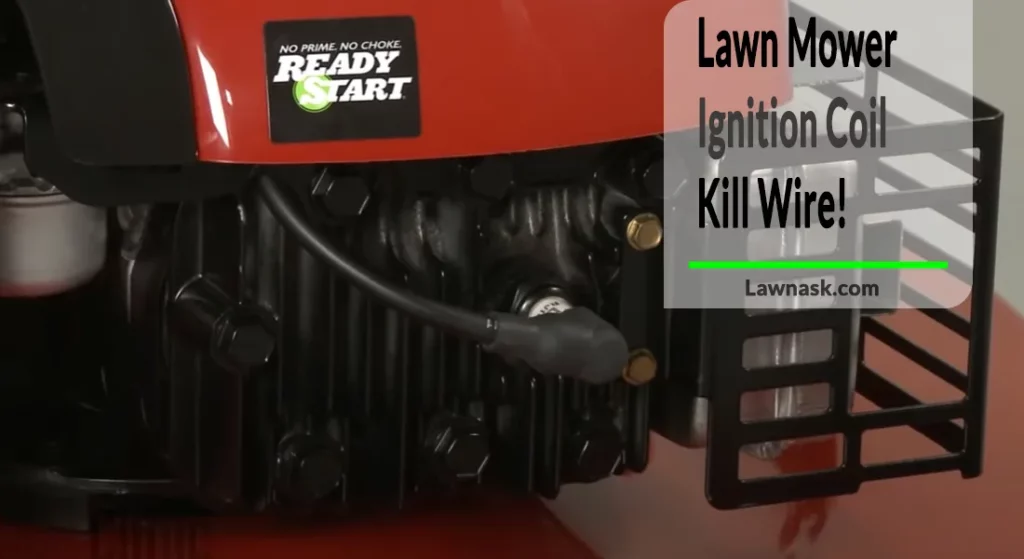
Everything You Need To Know About Lawn Mower Ignition Coil Kill Wire!
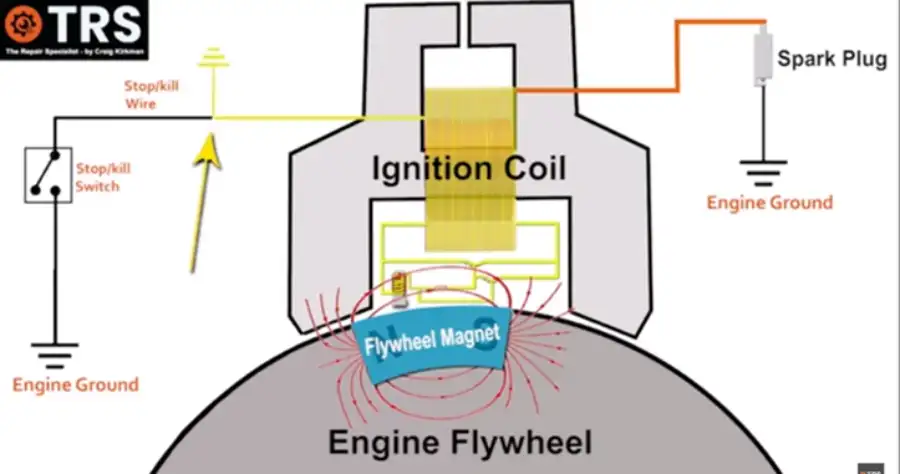
In a lawnmower’s ignition system, the kill wire grounds out the ignition coil to turn off the engine. A malfunctioning or broken kill wire might prevent the engine from starting or cause it to perform poorly.
The kill switch is connected to the ignition coil by the kill wire, and when the switch is turned on, it prevents power from reaching the spark plug, stopping the engine.
Learn more about your lawn mower ignition coil kill wire by reading this article.
How Does Lawn Mower Ignition Coil Kill Wire Work?
An ignition coil is standard equipment on every mower. By regulating the voltage, the system is kept operational. The spark plug relies on the ignition coil to receive power from the battery. As a result, the mower’s engine keeps revving and generating spark.
The engine’s ignition and the kill switch are linked by the kill wire. The safety switch disconnects the ignition coil from the spark plug and connects the coil to ground through the kill wire if the operator gets off the mower while the blades are still spinning.
When the kill wire is connected to the ground, it causes a short circuit that disables the ignition coil and hence the engine. By allowing the electrical charge produced by the ignition coil to flow via the kill wire and into the ground, the engine can be effectively turn off.
While the engine is operating, the kill wire harness prevents the two coils from shorting each other out by connecting them with diodes, but it still permits the two coils to be shorted from a single switch.
Where Is Ignition Coil Kill Wire Located In Lawnmower?
This engine of most lawnmower has a very straightforward ignition mechanism. It begins with an ignition coil originating from the flywheel magnet.
A kill wire is connected to the coil’s underside. No spark will reach the spark plug if the opposite end of this wire is grounded.
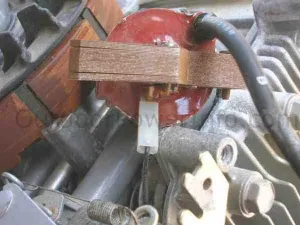
The opposite end of the kill wire is linked to a clip on the bottom of the control bracket.
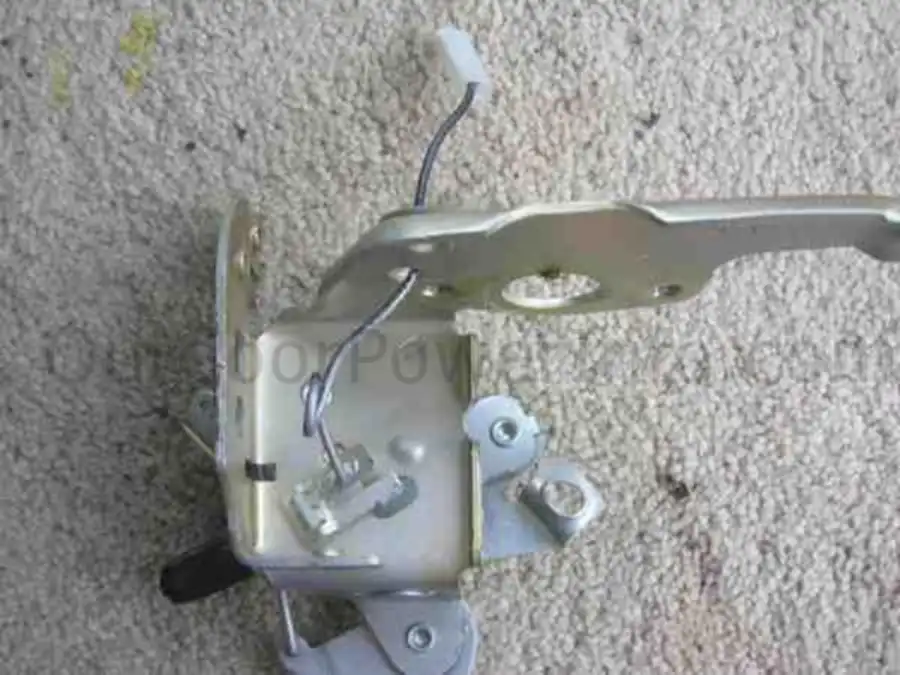
The kill switch is just a blade that makes contact with the ground when the control lever is moved.
Related Post: What is the Gap Between Ignition Coil and Flywheel
What Are the Problems May Occur in Lawn Mower Ignition Coil Kill Wire?
Most lawn mower users frequently experience problem of mower not shutting off or not running for very long.
And this problem has something to do with the ignition coil kill wire.
Mower engines rely on ignition, which is produced by the spark plug and serves as the driving power.
The most common reasons for a short in the kill wire are faulty connections in the ignition system, a cut or removed “kill” wire, or damaged outer insulation that allows the center core, which sends electron flow to the engine block, to take the shortest route to the ground instead of the spark plug.
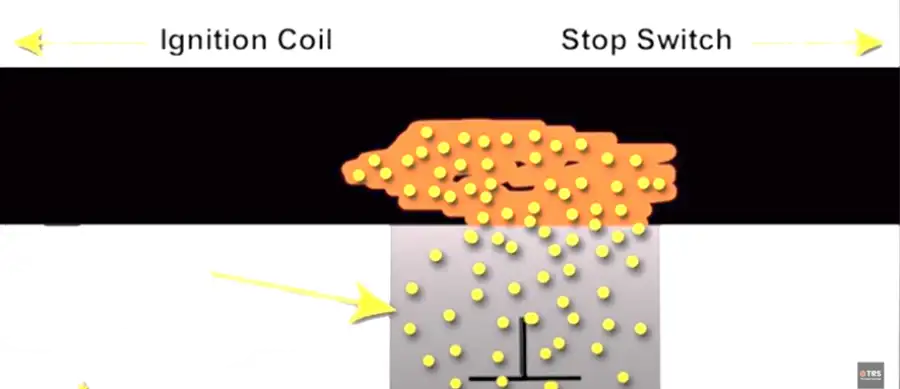
Electron flow through kill wire
If the short is in between the ignition coil and stop switch this is a problem. If it is lower than the stop switch it is just another grounding and not a problem.
How to Test for a Shorted Ignition Coil Kill Wire?
A multimeter can be used to check for shorts in the kill wire of a lawnmower. Here are the steps:
Step-1 Disconnect the spark plug
Disconnect the spark plug wire from the spark plug to prevent the engine from starting accidentally while testing
Step-2 Locate the kill wire
Locate the kill wire, which is usually a small wire connected to the ignition coil, and disconnect it from the ignition module.
Step-3 Multimeter setting
Set the multimeter to the ohms (Ω) setting and turn on the audible feature.
Step -4 Connect the Positive And Negative lead
Connect one lead of the multimeter to the end of the kill wire and the other lead to a ground on the mower. Multimeter sends out its current of electron flow up to the negative probe and into the kill wire. If there is a short in the kill wire the charge will go down the kill wire and sense ground way before it gets to the switch.
Step-5 Evaluate Readings on Multimeter
If a wire has continuity, electricity can travel without any interruptions along its length. Even if the wire is accidentally shortened, it is still possible for there to be continuity.
If the kill wire for a lawnmower’s ignition coil is damaged, the circuit will still be complete but the engine will not start or shut off when the kill switch is flipped. While dealing with electricity, it is important to ensure the circuit’s continuity and functionality.
Step-6 Check the Wire for Any Visible Damage Or Breaks.
If there is visible damage, the wire may need to be replaced. If there is no visible damage, the short may be caused by a faulty ignition coil, which will need to be replaced.
Related Post: Kohler Ignition Coil Problems: How to Fix it?
How To Remove Lawn Mower Ignition Coil Kill Wire?
Remove and replace the ignition coil kill wire on your lawnmower if it has become shorted. Here’s how to get rid of a lawnmower’s shorted ignition coil kill wire:
- Take out the spark plug and disconnect the wire from the plug.
- Identify the ignition coil on the engine, which is normally located near the flywheel.
- Locate the kill wire, a black (normally) cable that links the engine’s ignition coil to the emergency stop button.
- Take the kill wire out of the ignition. You may need to unlatch a small retaining clip or turn a screw to get this done.
- Follow the other end of the kill wire to where it connects to the kill switch. The kill switch cable should also be disconnected.
- Look for frayed or broken insulation on the kill wire to indicate damage or wear. The wire must be replaced if it is broken.
- The continuity between the wire’s ends can be checked with a multimeter to see if it is working properly. If the current flows unimpeded, then means the wire has a short and needs to be replaced.
- If the kill wire is shorted, you must replace it with a wire of the same gauge and length. Connect the ignition coil end to the new wire and the kill switch end to the old wire in the same manner as before.
- Test the lawnmower’s starting and stopping mechanisms after installing the new kill wire by reconnecting the spark plug wire to the spark plug.
Remember to always refer to the lawn mower’s manual for specific instructions and safety precautions before attempting any repairs
Frequently Asked Questions (FAQs)
Why is it necessary to test the kill wire for the ignition coil on my lawn mower?
It is necessary to test the lawnmower’s ignition coil kill wire for safety feature.
Why do ignition coils on lawn mowers fail?
If it fails, it is usually because of overheating brought on by a connection between the ground wire and the battery voltage that has been done incorrectly.
What causes the lack of spark in my lawn mower?
It may be due to frayed wires, grounding issues, short circuits, or a faulty emergency stop switch.
Why is a kill switch necessary?
A kill switch prevents data theft or shuts down machinery in an emergency.
Related Posts:
- Common Lawn Mower Ignition Switch Problems and Their Solutions
- Tackling Ignition Coil Problems in Lawn Mowers: 6 Fixes and a Replacement Guide
- Identifying and Resolving Ignition Switch Problems in Cub Cadet Mowers
- Tackling Ignition Coil Problems in Lawn Mowers: 6 Fixes and a Replacement Guide
- Explaining the Purpose and Function of a Muffler on a Lawn Mower