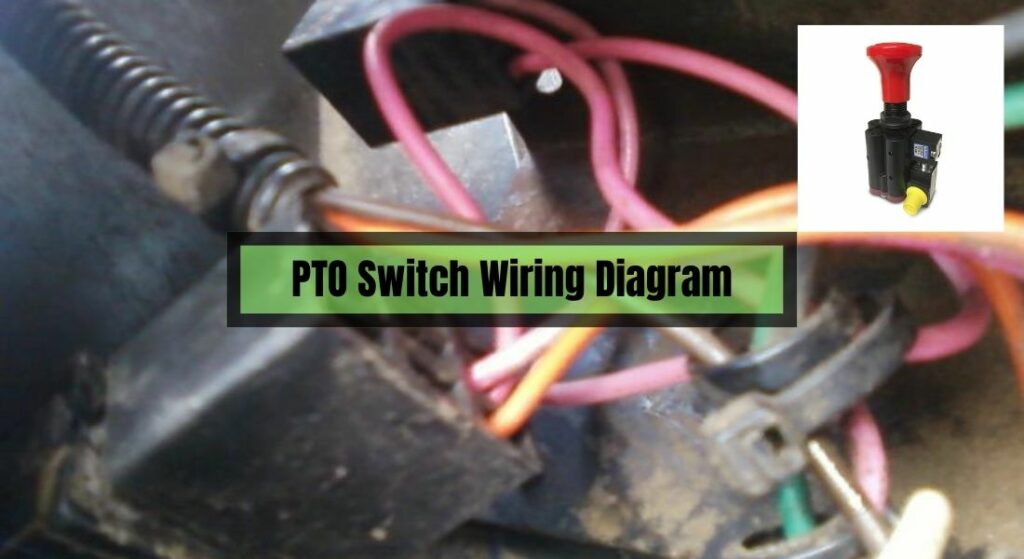
The Guide on PTO Switch Wiring Diagram
A sophisticated wiring system guarantees that all of the lawn mower’s components operate in conjunction. The wiring schematic for the PTO switch is a vital component of this wiring system.
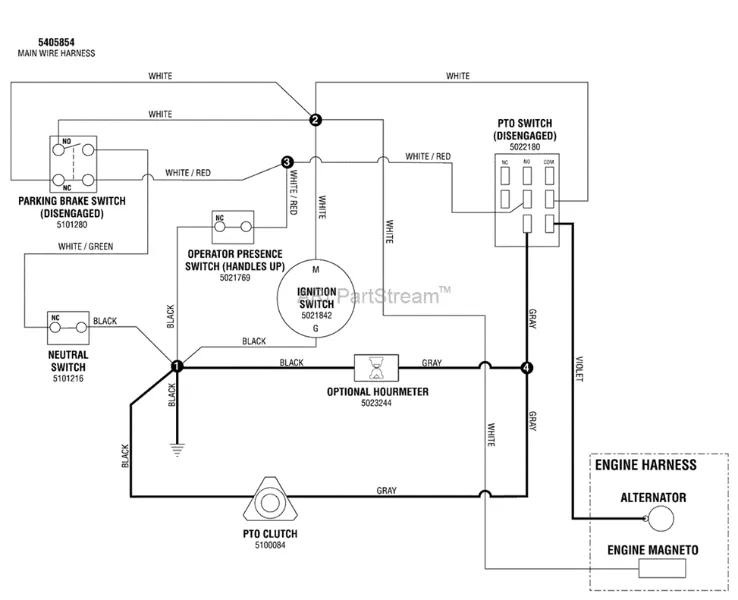
The PTO switch, PTO clutch, alternator & magneto, hourmeter, parking brake switch, neutral switch, operator presence switch, and multiple wires are all parts of the system.
Learning how these parts interact will help in the identification of electrical problems. In this article, the many components of the PTO Switch Wiring Diagram will be discussed thoroughly.
Location and Application of Important PTO Switch Wiring Parts (Prices Included)
The PTO switch wiring diagram shows the internal connectivity of the various parts mentioned above. Take a look at the diagram and the detailed description of all these equipment.
1. PTO Switch
A key part of a mower is the PTO switch, sometimes referred to as the Power Take-Off switch. It is found on the dashboard or control panel. The primary purpose is to activate or deactivate the engine-to-PTO clutch power transfer.
The PTO switch activates the PTO clutch by sending an electrical signal when it is in the on position. It thus makes it feasible to get the blades or attachments to spin.
The switch interrupts the flow of electricity when it is in the off position, on the other hand. As a result, the blades are effectively stopped from rotating. It costs around $10 to $60.
Related Post: What is a PTO on a Lawn Mower?
2. PTO Clutch
The lawn mower’s PTO clutch is situated halfway between the engine and the cutting deck. To transfer power from the engine to the blades or attachments is its function.
The PTO clutch receives an electrical signal when the PTO switch is activated. The clutch then engages and transfers engine power to the cutting mechanism.
As a result, the blades may spin and cut the grass. The PTO clutch releases when the PTO switch is turned off and stops the power transmission and the blades. It costs from $50 to $500.
3. Ignition Switch
On a lawn mower, the ignition switch is often found on the control panel. It performs the function of the electrical system’s primary power control. The electrical circuits are turned on when the ignition switch is in the on position.
As a result, it enables power to move to a number of items, including the engine, PTO switch, and others.
The electrical system is turned off and the engine is switched off by turning the ignition switch to the off position. These cost between $10 to $40.
4. Parking Brake Switch
A lawn mower’s parking brake mechanism is positioned next to the parking brake switch. The objective is to guarantee the operator’s security.
By prohibiting the blades from interacting while the parking brake is not applied, it achieves such. The parking brake switch identifies the position when the parking brake is applied and enables the PTO switch to activate the blades.
The parking brake switch, however, breaks off the electrical connection if the brake is not applied or is disengaged. It therefore stops the PTO switch from turning on the blades. It costs from $5 to $25.
5. Neutral Switch
The lawnmower’s neutral switch is situated next to the transmission or gear lever. It is in charge of recognizing whether or not the mower is in neutral.
The neutral switch enables the PTO switch to activate the blades or attachments when the mower is in neutral. The neutral switch, however, breaks the electrical circuit whether the mower is in gear or any other position.
As a result, it prevents the PTO switch from turning on the blades for safety. It costs between $10 to $35.
6. Operator Presence Switch
On a lawn mower, the operator presence switch is often found on the seat or the handlebars. By assessing if the operator is present and in charge of the mower, it assures their safety.
The operator presence switch winds up the electrical circuit when the operator is seated or holding the handlebars. It enables the blades to be engaged by the PTO switch.
The driver may, however, get up from the seat or remove the handlebars. The operator presence switch interrupts the circuit if this takes place. It thereby disengages the blades and avoids any mishaps. It costs between $10 to $30.
7. Hourmeter
An extra element that may be mounted on the control panel is the hourmeter. It offers useful details regarding the mower’s working hours. Tracking maintenance intervals makes good use of this functionality.
The total number of hours the engine has ran is shown on the hourmeter. It costs from $10 to $60.
8. Alternator & Magneto
The engine harness is made up of a number of wires that link the engine’s electrical parts. It has connections for both the engine magneto and the alternator.
The alternator is in charge of producing the electricity needed to recharge the battery. The electrical system of the mower is also powered by it. It costs between $50 to $200.
The magnetic field necessary for creating a spark in the ignition system is produced by the engine magneto. It costs between $30 to $200.
9. White, Gray, and Black Wires
Different colored wires in the wiring system have various functions. The common or neutral connections are often made using white wires. They offer a route for electrical current to return.
Gray wires are frequently connected to security features or signaling systems. To communicate signals from switches or sensors to the electrical components, they are employed.
Black cables frequently denote live or power connections. They transfer the electrical current between various components and the power source.
Related Post: John Deere Electric PTO Troubleshooting Guide
What are Some Common Problems of Damaged PTO Switch Components?
Below are some common issues with the PTO switch wiring:
- Blades not engaging: If the PTO switch is actuated but the blades do not engage, there may be an issue with the PTO switch or wiring. Examine the PTO switch for any indications of dysfunction and look for any loose or broken electrical connections.
- Blades not disengaging: If blades do not disengage after the PTO switch has been switched off, the PTO clutch or switch may be to blame. Check the switch to make sure the clutch disengages correctly when it is turned off.
- No power: The ignition switch may be to blame for this issue. Check for continuity and inspect the connections at the ignition switch.
- Faulty safety features: Operator presence switches and parking brake switches that are not operating properly might be caused by defective switches or wiring problems. Test the switches and check the connections.
Frequently Asked Questions – FAQs
Can I add an alternative hourmeter to my lawn mower?
Check the manual to be sure.
Can I connect mower accessories using a gray wire?
No.
How frequently should I consult the wiring diagram for upkeep?
Always be consul it while doing maintenance or troubleshooting.
What is the lifetime of a PTO switch?
3 to 10 years.
Related Posts: