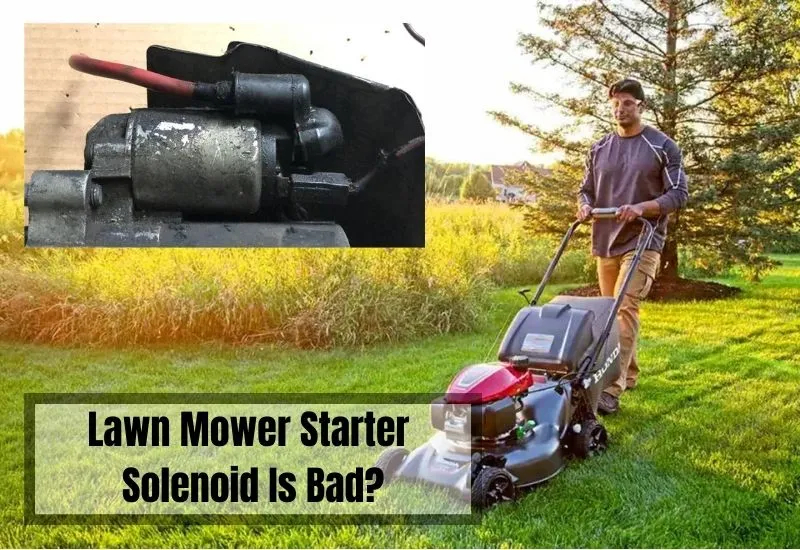
How To Tell If Your Lawn Mower Starter Solenoid Is Bad?
The starter solenoid in a lawnmower is an on/off electromagnetic switch located near the battery. When you turn the ignition key, it receives a signal from the battery and sends a strong current to the starter motor, powering up the engine. But how can you tell if your lawnmower’s starter solenoid is bad?
Common signs of a bad starter solenoid include the mower not starting, unusual clicking sounds, black smoke, a dead battery, or faulty battery or electrical connections.
Keep reading to learn how to identify a faulty starter solenoid and how to replace it step by step.
How To Tell If Lawn Mower Starter Solenoid Is Bad?
If you notice difficulty/complete starting failure as you try to start your mower or a weird clicking sound coming from your lawn mower, it is a clear sign that the starter solenoid on your lawn mower gradually deteriorates or has any issues.
Besides that, you can also notice one or multiple following early signs if your starter solenoid has turned bad so pay attention to ensure whether the starter solenoid is good or bad.
5 Symptoms That Indicate Bad Starter Solenoid:
- Motor Starting difficulties/ You might notice that your mower clicks as you try to start the engine but, in the end, it will not start like usual.
- A strange clicking noise comes out as soon you turn on the ignition key.
- Constant smoke emission.
- Battery not charging/charge constantly draining or dead battery.
- Declining battery & internal electric connection.
5 Causes Why A Lawn Starter Solenoid Can Turn Bad
The most common reasons behind your lawn mower starter solenoid turning faulty or bad are:
- Built-up Moisture near the engine bay of your mower
- Corroded/Broken wiring or poor (old or loose) connection
- Mower engine overheating due to warmer weather
- Excess electricity flowing inside the mower starter solenoid for an extended period
- Old or deteriorated starter solenoid
How To Test Your Lawn Mower Starter Solenoid? (6 Easy Steps)
As soon as you notice any of the earlier signs, you should first confirm that the problem is only arising due to the bad starter solenoid and that no other faulty elements are causing this error.
To confirm that you test the solenoid by following these steps.
1. Check the Battery
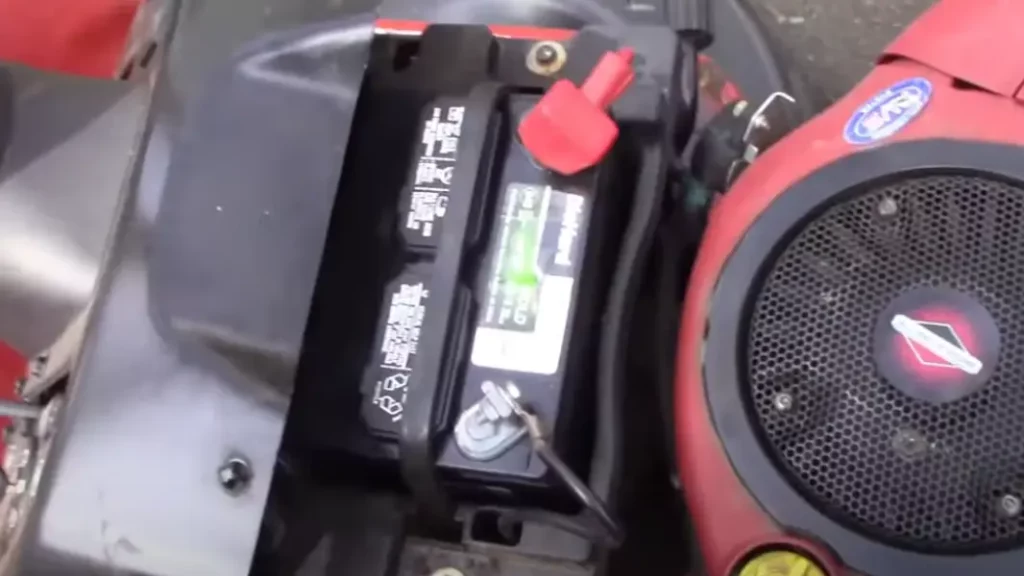
Inspect your mower battery to confirm whether it has 12 Volt or not to make sure it is fully charged.
Remember if you notice that your lawn mower battery keeps draining faster than usual, a bad solenoid is not the only driving force, and it can also happen due to other defective parts.
So, you need to test the battery to confirm it.
Take a digital multimeter to test the battery and if the battery is dead or the volt is continuously dropping, remove and replace the battery before moving forward.
Make sure the brake is locked, the blades are turned off & transaxle is neutral.
Check if the brake is pressed down and it’s in the locked position.
If not, position the brake accordingly and confirm that the mower blades are turned off.
Also, make sure the transaxle is in the neutral position.
2. Locate the Starter Solenoid on your Lawn Mower
In some lawn mower models, the solenoids are mounted under a panel behind the steering column underneath the gas tank.
But in some other models, you can locate the solenoid under a panel between your legs if you are sitting on the mower, and on other lawn mower models, you will locate the solenoid under the panel below the mower back seat.
The actual solenoid location will depend on which model lawn mower you own, and you can confirm it with the help of your mower’s user manual.
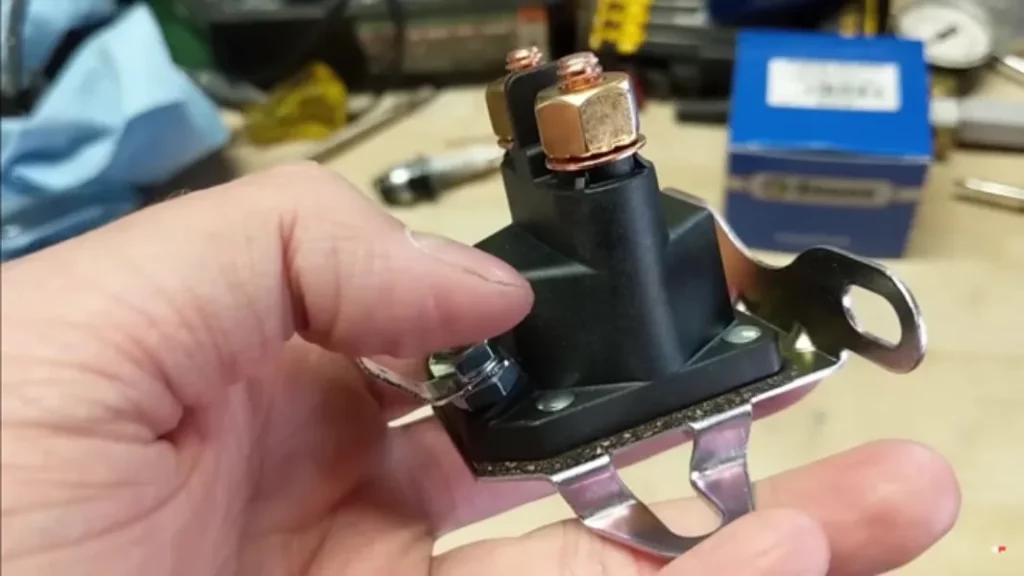
3. Determine Whether it’s a Three or Four Pole Solenoid
Once you have located the starter solenoid on your mower, you need to determine whether you have a three-pole solenoid or a four-pole.
Now how to identify whether you have a three or four-pole solenoid?
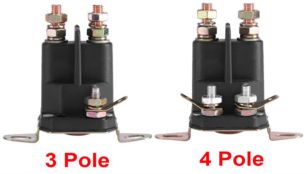
Look at the starter solenoid closely and if you find three places on your solenoid to attach the wires, it is a three-pole solenoid.
But if you can see four spots to connect the wires it means you have a four-pole solenoid.
4. Disconnect the Bottom Wire(s) and Connect the Multimeter
Now disconnect the little wire, and if it is a three-pole, it’s going to be the only wire on the bottom.
But if it is a four-pole, it will be on the bottom left-hand side.
Now set your multimeter to DC volt 20 or anything above 14 volts.
Then take the positive side of the multimeter and attach it with that disconnected little wire.
Take the negative side to connect to the ground (whether it’s a bolt or engine frame, either one will be enough).
5. Test the Starter Solenoid to Confirm its Condition
Turn the ignition key to the start position. Check whether the meter reading shows at least 12 volts or something below that.
If it shows something below 12 volts, it means one of the safety switches or grounds has gone bad, and you have to investigate further to confirm that.
But if you see 12 volts, connect the little wire back to the solenoid and take the positive lead to connect to the top right-hand side cable.
Once again, turn the ignition key on and if you cannot see 12 volts, it means either you have a bad starter solenoid ground or a bad solenoid.
Related Post: Why Mower Only Starts When I Jump Solenoid (Fixes Added!)
How To Replace a Starter Solenoid on A Lawn Mower?
The only solution to get rid of a bad lawn mower starter solenoid is to replace it with a new one _
Required Tools:
| Wrench set |
| Screwdriver |
| New Starter Solenoid |
| Set of Safety gloves |
Step 1: Turn the ignition switch off to remove the key and lift the seat to remove the bolt connecting to the battery negative cable.
Step 2: Lift the insulating cover to remove the bolt connecting to the battery-positive cable. Then, lift the battery out of the battery box and release the seat switch wire harness clip from the seat bracket.
Step 3: Lift the battery box out of the mower body and set the box on the fender. Note the wires connecting locations to the starter solenoid or take a photo so that you can reconnect them accordingly.
Step 4: Remove the mounting nuts from the terminals and pull the wires from the respective posts. Now pull the wires from coil spades and take off the solenoid mounting bolt.
Step 5: Bring the new starter solenoid and connect the mounting clips. Then, position the new starter solenoid on the frame and install the mounting bolt securely. Re-insert and connect everything else accordingly.
Related Post: Why Is The Lawn Mower Solenoid Keeps Going Bad?
Frequently Asked Questions (FAQs)
Is it possible to bypass my lawn mower starter solenoid?
Yes.
How long does it take to replace a bad starter solenoid on a lawn mower?
It mostly takes less than 30 minutes when an expert or professional mechanic performs it, but if you plan to do it by yourself and you have basic mechanical knowledge it might take a maximum of 30 minutes to 1 hour.
Your Turn
Various factors can lead the lawn mower starter solenoid to turn faulty, and if you do not replace it on time, it can cause further internal damage to your lawn mower.
But fortunately, you can get warned by five early symptoms when the internal solenoid is gradually deteriorating to replace the solenoid before it becomes too late, and servicing turns too expensive.
Related Posts:
- Exploring Whether Lawn Mower Solenoids are Universal
- Recognizing the Symptoms of a Bad Solenoid in Riding Lawn Mowers
- Is White Smoke from Your Lawn Mower a Cause for Concern?
- Engaging the PTO: Troubleshooting Guide for Lawn Mower Owners
- Oil Change Without Drain Plug: Alternative Methods for Your Lawn Mower