Briggs and Stratton Timing Problems – Reasons and Fixes Explained
Briggs and Stratton, a renowned name in small engines, produces reliable mower engines. However, like any mechanical system, Briggs and Stratton engines may encounter timing problems that can affect their performance and reliability.
Briggs and Stratton Timing Problems include – misfires, poor fuel efficiency, reduced power output, difficulty starting, and even engine damage.
Get ready to explore potential solutions to help troubleshoot and resolve these problems.
Understanding Engine Timing of the Briggs and Stratton Engine
Timing refers to the precise coordination of the engine’s moving components to ensure efficient combustion and power delivery. Timing refers to the ignition and the process by which the spark plugs fire, resulting in a spark in the small engine combustion chamber.
When the maximum air-fuel mixture is present in the chamber, the spark should ignite. This provides the most power for your fuel.
It is also related to the ignition of the fuel-air mixture. The timing mechanism ensures that these happen at the precise moment during the engine’s combustion cycle. Otherwise, the engine will not operate efficiently and produce power.
The typical mechanism for engine timing in Briggs and Stratton concerns mechanical linkages and gears that are driven by the engine’s crankshaft. The key components involved in the timing mechanism are the camshaft, the crankshaft, the piston, and the valves.
Common Causes of Briggs and Stratton Timing Problems
There are several potential causes of timing issues in Briggs and Stratton engines. This causes poor engine performance, decreased power output, increased emissions, or even engine damage.
Some common causes of timing issues in Briggs and Stratton engines include:
Worn or Damaged Timing Components:
Over time, the timing components such as the camshaft, crankshaft gear, timing belt, and related components can wear out, become damaged or misaligned. This can disrupt the precise coordination of the valves and ignition timing.
Mistiming:
When there is a valve/camshaft mistiming, there is the risk of a valve being struck by a piston (OHV engines only).
If the camshaft and crankshaft are mistimed (or become mistimed while running), the piston may strike an open valve in some engines. These engines are called “Valve interference engines”.
Incorrect Installation or Adjustment:
If the timing components are not installed or adjusted correctly, it can result in timing issues. This includes incorrect positioning of the camshaft, incorrect installation of the timing gear or belt, or incorrect adjustment of the valve lash.
Damage or Wear:
Engine damage, such as a bent or damaged crankshaft, or excessive wear in the timing components can cause timing issues. A large hole in the oil sump (due to the ductile material that was mowed over) can also cause the issue.
Clogging:
Dried-up sludge everywhere, including the muffler, carburetor etc. can cause timing issues.
Wear to Valve Train Components:
The valve train components, such as, the lifters, tappets, and valves, can also wear out or become damaged over time.
Improper Maintenance:
Lack of proper maintenance, such as failure to replace timing belts or chains at recommended intervals cause timing issues.
The failure to perform valve adjustments, or neglecting other routine maintenance tasks, can result in timing issues over time.
Environmental Factors:
Environmental factors such as exposure to extreme temperatures, dirt, debris, or contaminants can also affect the timing components’ performance and lead to timing issues.
Related Post: Briggs & Stratton Intek V-Twin Problems and Fixes
Fixing The Briggs and Stratton Timing Problems: Step-by-Step Guide
Fixing timing problems in a Briggs and Stratton timing issue happens in the following consecutive steps:
Step 1: Perform Initial Inspection
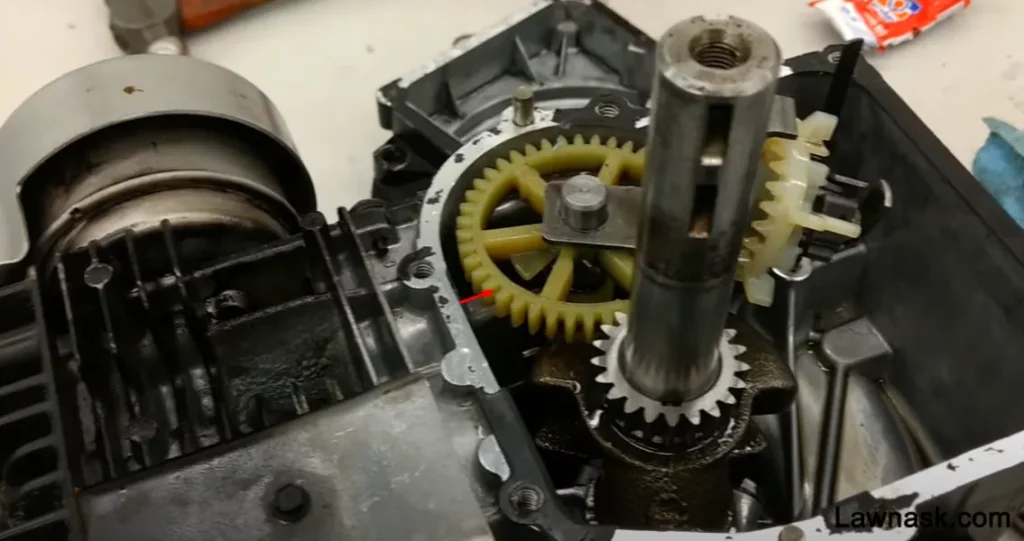
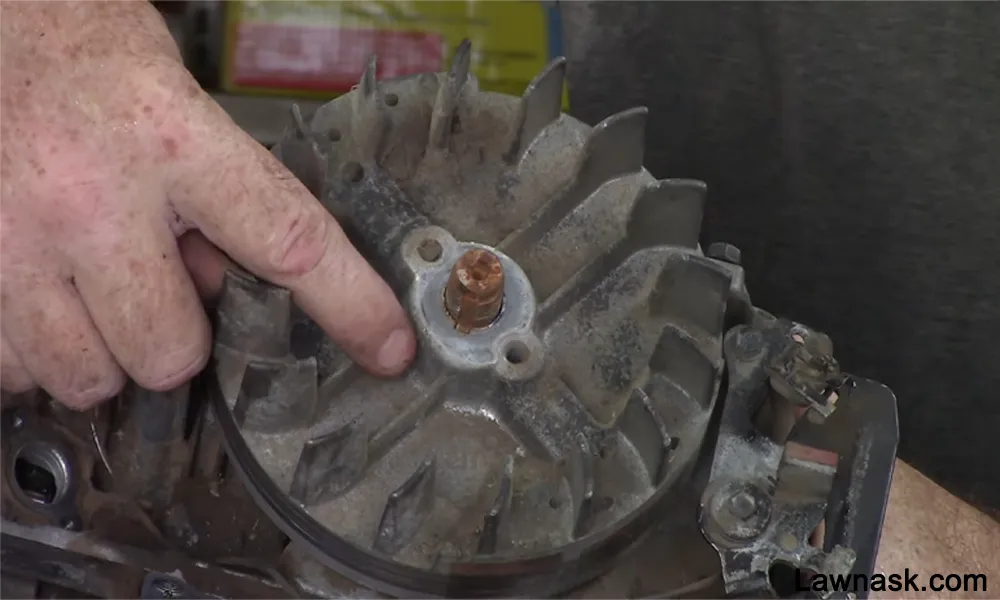
Inspect the timing components. This includes the camshaft, crankshaft gear, timing belt or chain, and related components for wear, damage, or misalignment.
Look for worn teeth, bent or damaged components, or misaligned gears or belts. Check if the white gear (governor/oil slinger) is installed correctly.
Check the valve train components, including the lifters, tappets, and valves, for wear or damage. Inspect the spark plug as well.
Step 2: Replace or Repair Timing Components
If any timing components, such as the camshaft, crankshaft gear, timing belt, or chain, are worn, damaged, or misaligned, they must be replaced or repaired.
Step 3: Check the Piston Position
Manually rotate the engine’s crankshaft to position the piston at the top dead center (TDC) of the compression stroke. You might use a piston stop or a degree wheel to accurately determine the TDC position.
Step 4: Check Camshaft Position
The lobes on the camshaft should be in the proper position (according to the manual). It will actuate the lifters or tappets at the correct time relative to the piston position.
Step 5: Check Valve Clearance
Check the valve clearance or valve lash for the intake and exhaust valves. If the valve clearance is not within the specified range, adjust it as needed to ensure proper timing.
Step 6: Check Ignition Timing
Verify that the ignition timing is set correctly. Check the position of the spark plug with the piston position and adjust the ignition timing as needed.
Step 7: Clean Clogged Parts
Unclog the clogged parts by cleaning the debris off them. The carb and muffler contain the most clogs, more frequently.
Step 8: Reassemble and Test
Once any necessary repairs or adjustments have been made, reassemble the engine according to the manufacturer’s specifications.
Make sure to double-check the timing settings and verify that all components are properly installed. Start the engine and perform a thorough test to ensure proper operation.
In case you want to know about adjusting the Briggs and Stratton timing, look here.
Tips for Avoiding Timing Problems in Briggs and Stratton Engines
Engine timing is a critical aspect of engine operation. So improper adjustments or repairs can lead to further damage or performance issues. Therefore, if you are not skilled enough to fix it, then seek professional help.
Similarly, some timing problems in Briggs and Stratton engines may be more complex. They’ll require specialized knowledge and equipment to diagnose and fix. In such cases, it is recommended to consult an expert.
When to Consult a Briggs and Stratton Expert
Many Briggs and Stratton engine timing problems can be diagnosed and repaired by DIY enthusiasts with some mechanical knowledge and experience. However, there are some situations when it is best to consult a Briggs and Stratton expert:
A persistent Briggs and Stratton timing problem could indicate a more complex or underlying issue. In such cases, a Briggs and Stratton expert can assist in determining the root cause of the problem and providing a more effective solution.
Moreover, when you are unsure about your ability to safely diagnose and repair the timing problem, it is best to seek the advice of a Briggs and Stratton expert. This will avoid potential safety issues.
Briggs and Stratton Timing Problems – FAQs
How often should the timing on Briggs and Stratton engine be adjusted?
It doesn’t need frequent checking. Only when the problems start, you can check and adjust the timing.
What are some common signs of incorrect engine timing?
Some common signs of incorrect engine timing include rough idling, poor acceleration, backfiring, and decreased fuel efficiency.
Do timing issues cause damage to other Briggs and Stratton engine components?
Yes. Improper timing can result in poor combustion, excessive heat, and increased stress on the valves, pistons, and other engine parts. This leads to accelerated wear and potential damage to these components.
Can I use aftermarket or non-genuine timing components in my Briggs and Stratton engine?
Ideally, no. It is recommended to use genuine Briggs and Stratton parts or parts that are recommended by the manufacturer for optimal engine performance and reliability.
Related Posts:
- Toro Engines vs Briggs and Stratton: A Comparative Analysis
- Briggs and Stratton Engine Popping: Common Causes and Fixes
- Briggs and Stratton Engine Starts but Won’t Stay Running: Troubleshooting Guide
- Cub Cadet Walk Behind Mower Problems: Diagnosis and Solutions
- Walk Behind Mower Transmission Problems: Troubleshooting and Fixes