Top Reasons Why Your Honda Lawn Mower is Leaking Oil from the Bottom
When mowing your lawn, think of oil leaks as a growing problem, much like a fire spreading across your grass. It can feel overwhelming if left unchecked, right?
To prevent this problem from becoming real, it’s essential to understand oil leaks in your lawn mower. If you own a Honda mower, this guide is tailored specifically for you.
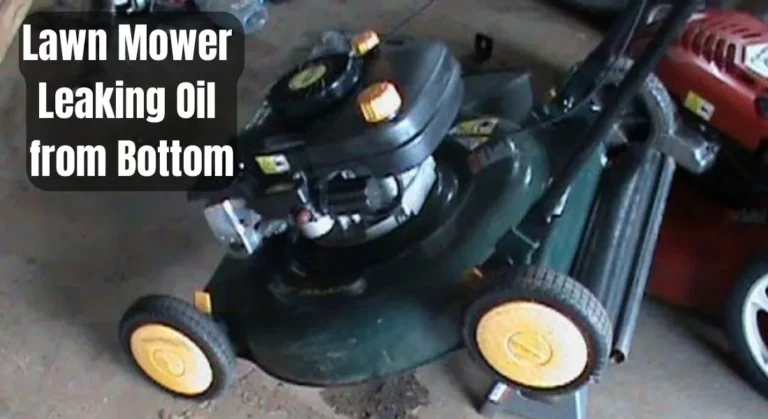
So, why is your Honda lawn mower leaking oil from the bottom? In short, worn-out lower bearing seals or valve gaskets often cause oil to leak and need immediate repair or replacement.
But before we dive into solutions, let’s first understand the problems oil leaks can cause.
Troubles from Having an Oil leak in a Lawn Mower
More often than ever, we seem to overlook the stroke of sheer bad luck that oil leaks bring with it. Don’t forget to take a quick look into such troublesome occurrences before hopping into the next section!
- Damage to the engine and internal parts
- Emitting of white or bluish smoke from the
- Spark plug might burn and turn engine off
- Air filter will get contaminated and exhaust the engine
- Mower muffler gets clogged and arises risk of noise and ignition
- Fuel runs out faster and destroy the internals
- Carburetor will act up and mower will not start
Sourcing the Oil Leak
The first and foremost requirement to saving yourself from a fire mishap is to locate and repair the oil leakage source. But before you get into the trickier part, you need to do the basics.
Hence, let’s continue and look into two of the best ways for the task.
1. The Traditional Way
Firstly, scrub the engine block with a soft cloth and if needed, a clean toothbrush, to get rid of any residual debris and oil. Once this has been settled, turn the engine on and let it run for a while. Lastly, switch it off and look for any traces of oil drops and leaks.
2. UV Leak Detector Kit
Another not-so-conventional way is to get your hands on this fine device, which is a UV leak detector kit. It comes with an array of items such as a UV light source, a pair of glasses, a dye injector as well as a fluorescent dye to do the main job of detection.
Simply follow the instructions provided on the user manual of the kit and you’ll be done in a jiffy!
Bottom Leakage?
Now, leaks can stem from a variety of points, be it the base of the engine, near the bottom of the deck, or the crankcase breather, you just name it.
However, the most common of them all is when the oil starts to seep out through the oil tank and floods the engine base or the deck. To confirm whether the oil leak sources from the bottom of your Honda lawn mower, use the above methods in a careful manner and check for any signs of holes at the bottom.
Given that the suspicions are right, you know it’s high time to get it repaired or replaced.
Why Honda Lawn Mower is Leaking Oil from Bottom
Lower Bearing
The ring seal on the lower bearing, also known by an oil seal, helps in fastening the crankshaft and causes the blade of your lawn mower to spin heftily.
Whenever this ring seal is in tatters, oil will directly seep into your engine. And once this happens, your carburetor will fail to efficiently induce combustion due to lack of fuel and eventually cause gas to leak out and damage your Honda mower.
However, one thing to keep in mind is to always keep in check whether the carburetor is tilted upwards, otherwise the gas leak is inevitable.
In case you’re suspecting the lower bearing ring seal to be the underlying cause of oil leakage, simply examine the engine in the “traditional” way to look out for leaks and repair it immediately.
For the best scrutinization, keep eyes on the seals right after you have switched on the lawn mower as the oil’s viscosity reduces while cooling down and offers poorer examining.
Upper Bearing
Given that you notice oil deposition on the deck on your Honda lawn mower, the significant reason behind it may be the upper bearing’s ring seal being damaged or broken.
Your next question might be, “But where is this seal so I can locate the leak easily?” Well, you can simply find this upper bearing ring seal on the meeting point of the crankshaft plunging into the crankcase breather.
Due to the continuous rotation of the crankshaft, this seal seems to wear off with time. Nevertheless, poor conditions such as extreme dirt and debris accumulated in the engine can cause them to deteriorate much faster.
For better inspection of oil leaks, be certain to take off the engine shroud and starter initially and then move on to the flywheel with the proper tools needed. Likewise, move on to the repair or replace work and you’ll be good to go.
Valve Gasket
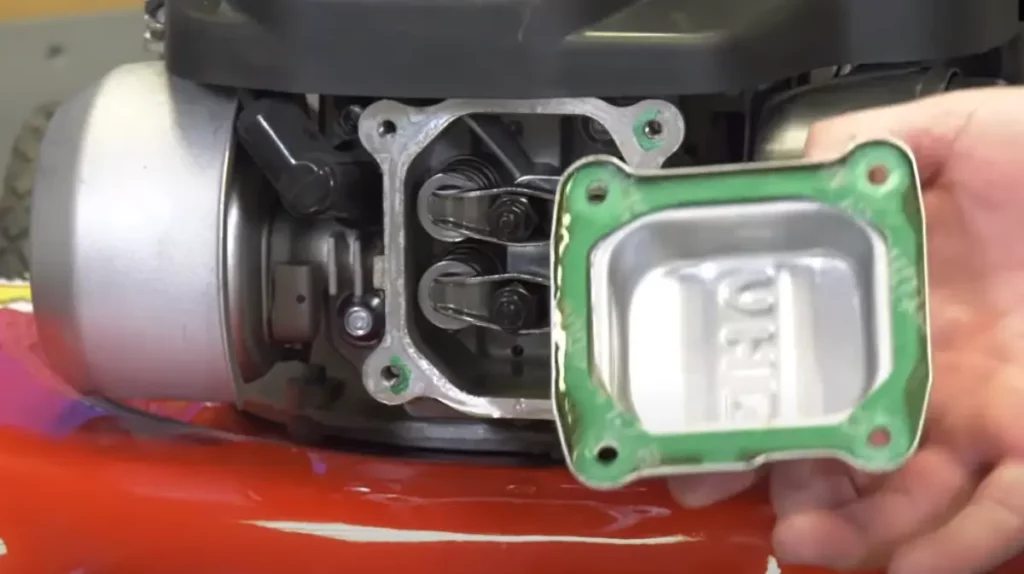
A specifically important part on a Honda lawn mower or any other in general is the head or valve gasket. For common knowledge, the seal on this valve gasket aids in air-tightening the connection between the valve cover and its chamber.
And once this seal gets worn out with days passing by or even more sadly, has blown off, oil will leak off heavily. The end result? Your mower will power down and start to function poorly, especially on bumps and hills.
Hence, if and when this happens, make sure to follow the above guidelines to check for oil buildup or leaks and get it replaced right away!
Repair or Replace
Herein comes the vital part of our discussion. Should we repair the oil leaks on our Honda lawn mower or do we replace the parts without a second thought?
To be frank, this entirely depends upon the circumstances. Nonetheless, our best advice for such situations is to get them replaced, if not impossible to do so at the moment. The reason behind this is quite simple- safety always comes first! After all saving a life should be counted as more than saving a few bucks anyway.
Hence, unless it’s really necessary, don’t even bother to go through the repair techniques that we’re about to put forth and get the parts replacement immediately.
Repairing the Gasket
This part is pretty straightforward. Just remove the bolts from the gasket cover and use a scraper to take off every bit of oil buildup as well as the worn out gasket. Then install a new one carefully without harming the engine. Be certain to follow the owner’s manual to repair in accordance to the torque specs established by the manufacturer.
Repairing the Seals
To get the seals repaired, firstly locate the exact seal which keeps seeping out all oil.
For the upper seal, simply remove the motor shroud, crank rotator and flywheel respectively and take off the seal.
Even so, the lower bearing seal repair will require you to remove the engine beforehand. Be sure to drain the engine of oil, unfasten all the cables as well as take off the mower blade and deck cover prior to unbolting the engine.
Once taken care of, use a seal remover tool or a screwdriver to detach the seal from either the upper bearing or the lower bearing. Then install a new one by simply pressing it firmly and reassembling the rest of the parts into place.
Pro-tip: Avoid under- or over-tightening the fasteners to prevent possible oil leaks in the future.
Final Verdict
With this, we have reached the end of our assistance on why Honda lawn mower leaking oil from the bottom. In conclusion, keep your mower in check once every week for any signs of oil leakages and get it fixed right away to avoid severe damages to the engine or worst case scenario, an inevitable explosion.
Lastly, we wish you the very best on figuring out the problems and solutions by now!
Related Posts:
- Troubleshooting Guide for Smoking and Sputtering Lawn Mowers
- DIY Solution for Lawn Mower Engine Stalling When Clutch is Released
- Understanding the Reasons and Solutions for a Non-Cutting Lawn Mower
- Complete Guide to Resolving Slow Reverse Movement in Hydrostatic Lawn Mowers
- Reasons and DIY Fixes for Yard Machine Lawn Mower Not Starting


